Teamenia - Lets Make It Done
Self Hosted Project Management System
Teamenia is the best project management software for small & medium size companies.
It is a complete automated project management system with easy installation and no monthly cost.
Created: 01/01/2022
Email: [email protected]
Admin Dashboard
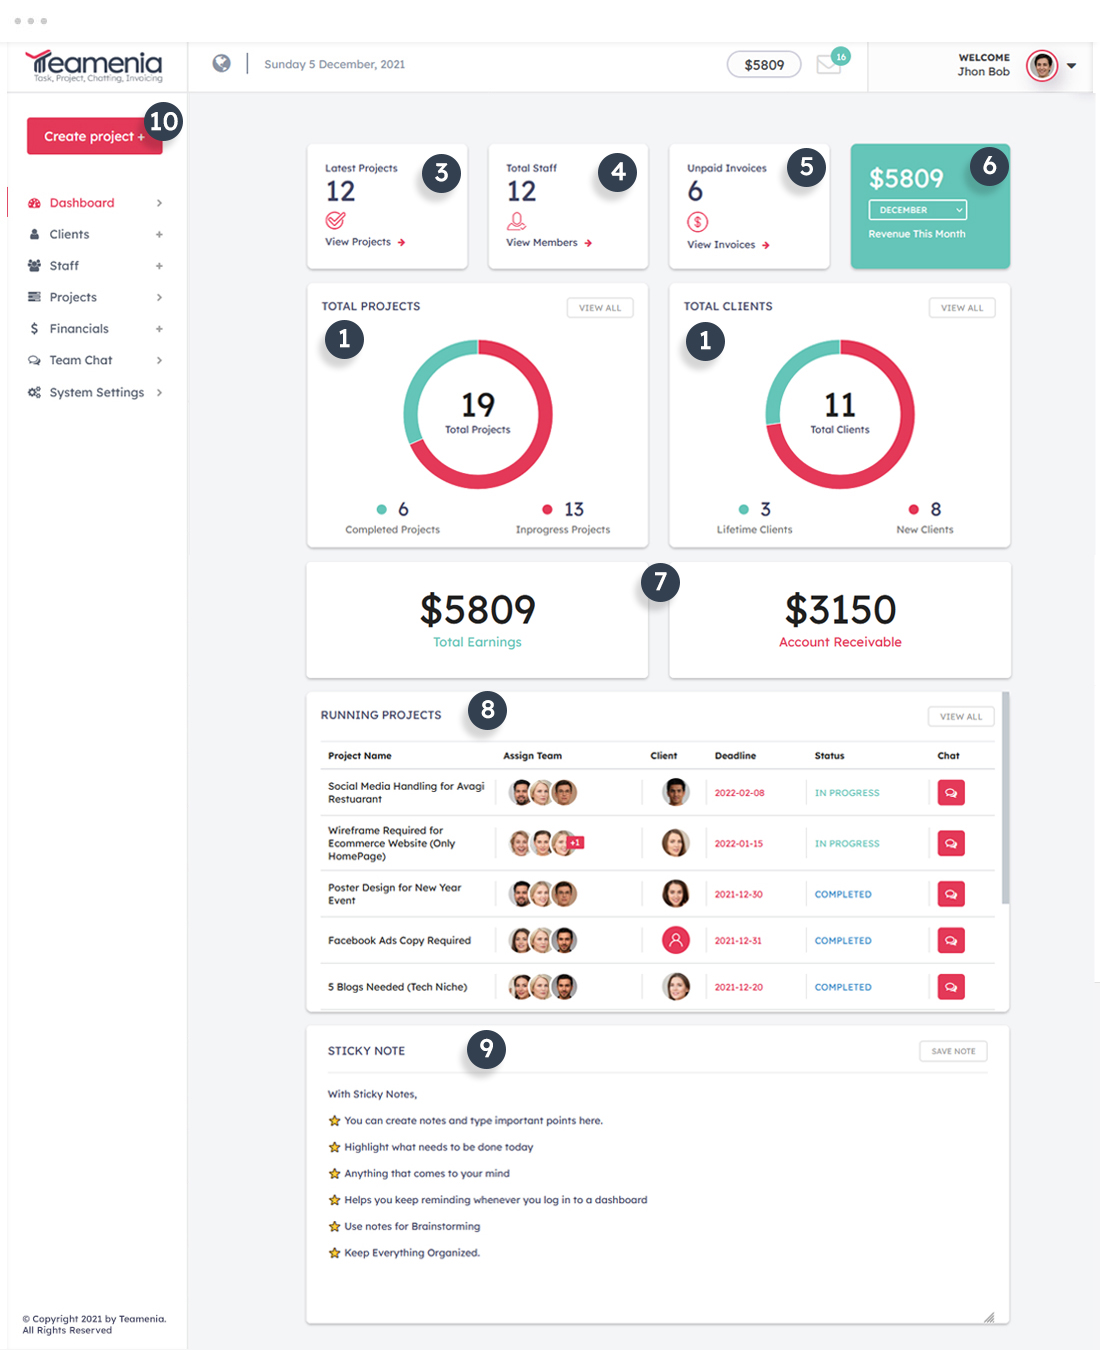
- This shows all of your completed & in progress projects all together at one place.
- This can help you to see how many total clients you have from the start and how many active clients you have now.
- This will help you to know how many projects you have got in a complete month.
- This shows how many staff do you have in total.
- This shows a quick overview of un-paid invoices.
- This shows your total earnings per month. If you want to check last month earnings then use drop down to select your desired period.
- This shows your life-time earnings & Receivable amounts.
- This shows list of your all running or active projects.
- This shows your most important points or notes.
- This shows how you will create a new project.
To learn more about the application please check all parts of this documentation. In this documentation, we'll describe different parts according to the screenshots.
Features
-
Dynamic graph and visual report
-
Project management
-
Client Portal
-
Staff Portal
-
Team conversation
-
Private messaging with team members and clients
-
Project, milestones, Sticky notes, files
-
Web and email notifications
-
Client portal
-
All reports on client Dashboard
-
Informative profile page for client contacts
-
Invoice management
-
Invoice pdf, online payment (PayPal, 2checkout and Stripe)
-
Private notes
-
Team member's Profile view
- And more...
Installation
To install the system on your server, firstly you need to download it and then install it. After installation, You can sign in to dashboard.
Server Requirements
- VPS server Recommended For smooth chatting experience, We recommended VPS hosting otherwise you may face delay in messaging.
-
Apache with PHP and MySQL server
-
PHP v5.6+
-
MySql
-
Openssl Enabled
Quick Installation Guide
- Unzip the Teamenia - Project Management System.zip which you have downloaded from the Envato Market.
- Upload the files to your sever using any FTP client.
- The file structure should be look like this:
 admin
admin- ajax
- assets
- client
- images
- includes
- install
- payment-api
- staff
- templates
- upload
- user-upload
- /chat.php
- /chat_list.php
- /forgot-password.php
- /forgot-password-recovery-mail.php
- /index.php
- /logout.php
- /message-popup.php
- /messages.php
- /messages_load.php
- /realtime_chat.php
- /reset_password.php
- /start_chat.php
- Create a MySql Database via your web hosting providers Control Panel (e.g. cPanel). Once you have created the database, remember the following information:
- Database Name
- Database Username
- Database Password
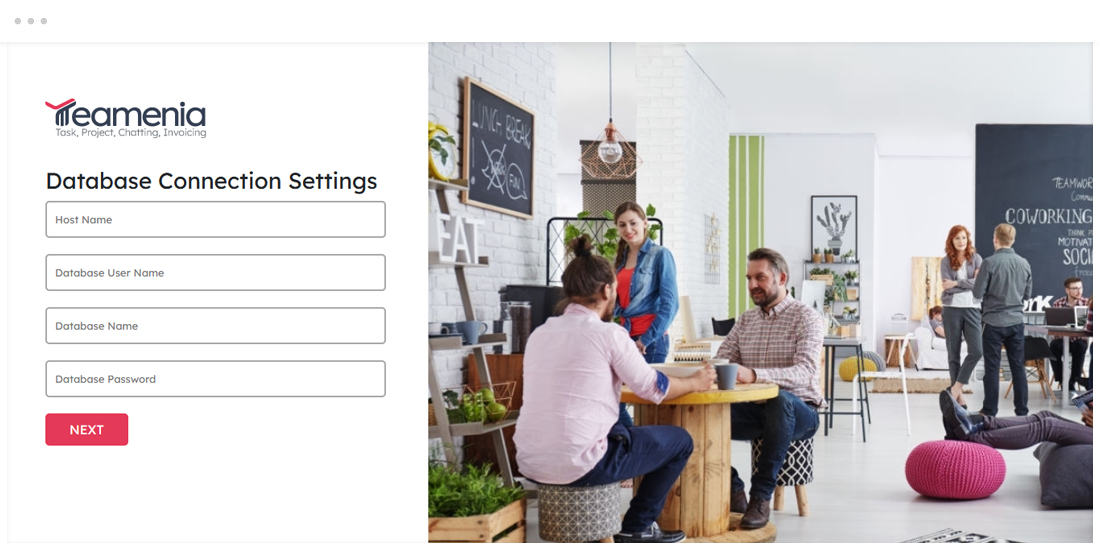
- Open your web browser and enter the url (http://yourdomain.com or http://yourdomain.com/foldername) in the address bar.
- If everything is ok, you should get the installation page.
- Follow the instructions and click on the Next button. Then enter the database details which you have collected earlier. Finally, enter your name, email and password which will be required to login in the application. Then click on the Finish button and wait a while. The system will create necessary tables in database, files and configuration.
- That's all! After completing the installation delete the installation folder and login to your dashboard.
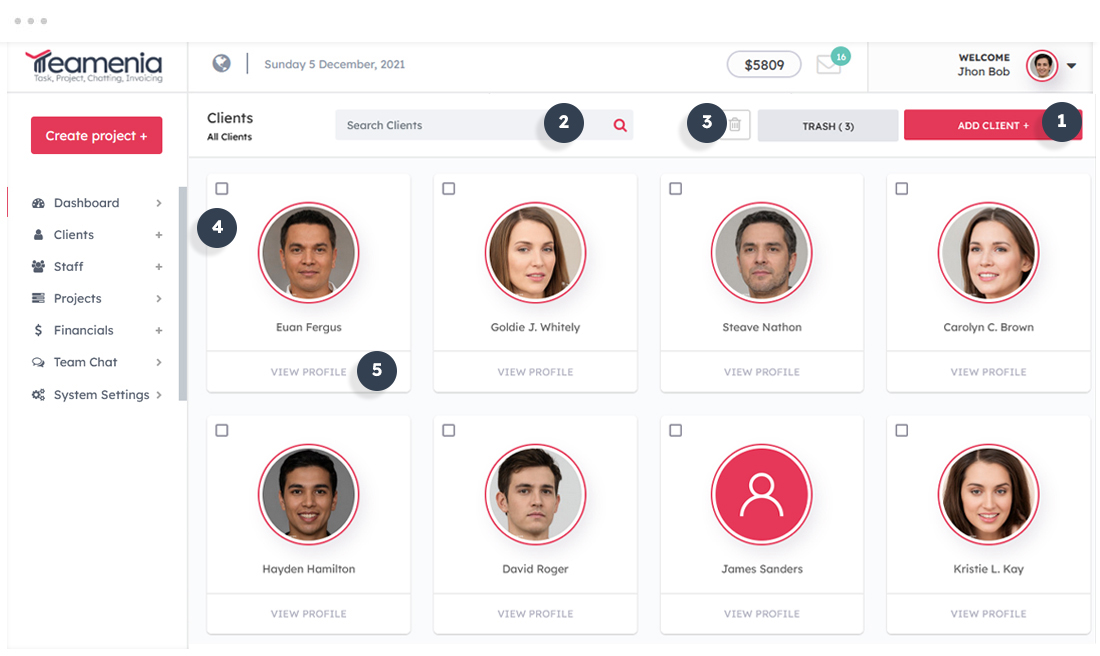
Client Section
You can create and manage your customers in clients section.
List of Client Section Features
- Click on ADD CLIENT button to add a new client to your dashboard.
- Search bar helps you locate all your existing or new clients.
- To delete your existing client, Click on the button. It will not permamently remove immediately. If you wish to permanently remove your client then empty the trash folder.
- Delete button will become Active once checkbox is filled.
- This shows you all of your client information. Click on view button
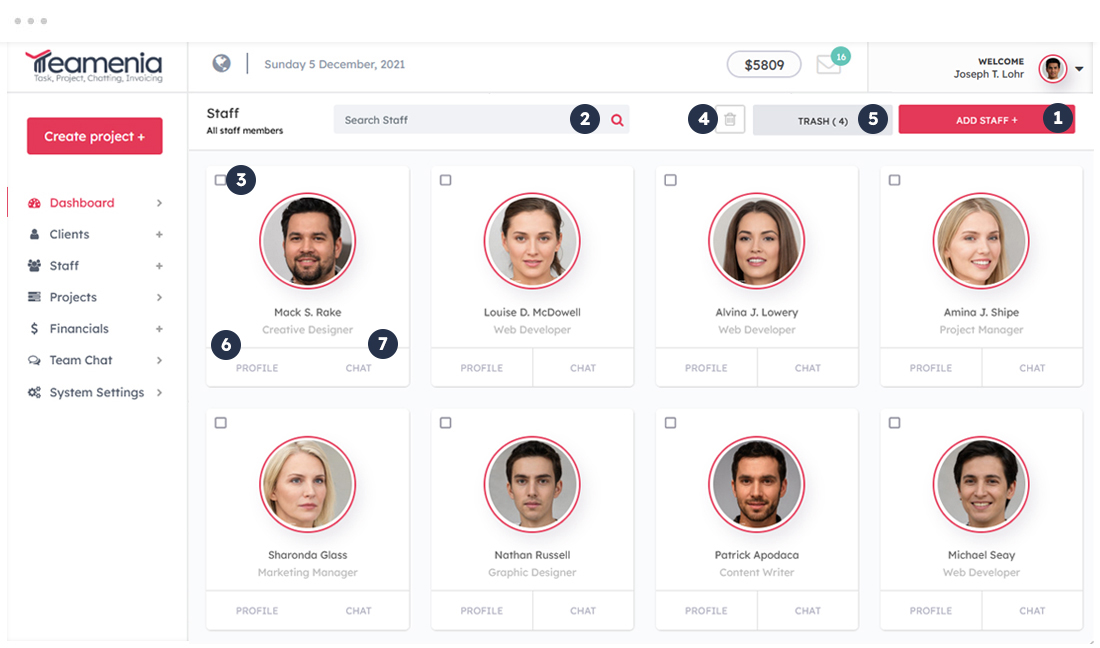
Staff Section
Using this application you can manage your staff members easily.
List of Staff Section Features
- Click ADD STAFF button to add new staff member to your team
- This will help you to find all your staff members
- Click CHECKBOX if want to delete/remove any of your staff member. As soon as you click on checkbox, Delete button will be active. The deletion of staff member will go in trash folder. So if you want retrieve again. you can do it as well.
- Delete button will become Active once checkbox is filled.
- This is Trash Area, Where you can find all deleted projects. You can also retrieve information from tash folder as well.
- This shows you all of your Staff information. Click on view button
- Click on Chat button to start your conversation with Staff
Projects
You can create and manage your projects here.

List of Project Section Features
- Clicking on Create Project will leads to open a new project.
- Each and every project will have a unique title name
- This shows how many staff member assigned to specific project
- This shows how many milestones been created, you can add unlimited milestones here.
- Under Action button you can perform different functions which are discussions – edit project details – Delete project – Mark as completed & can move the projects to archive.
- All archive projects can be find in archive section
- If you wish to delete multiple project then you can do it more than 10 projects altogether
- This is a trash section where you will find all deleted projects
Invoice
You can manage your invoices here
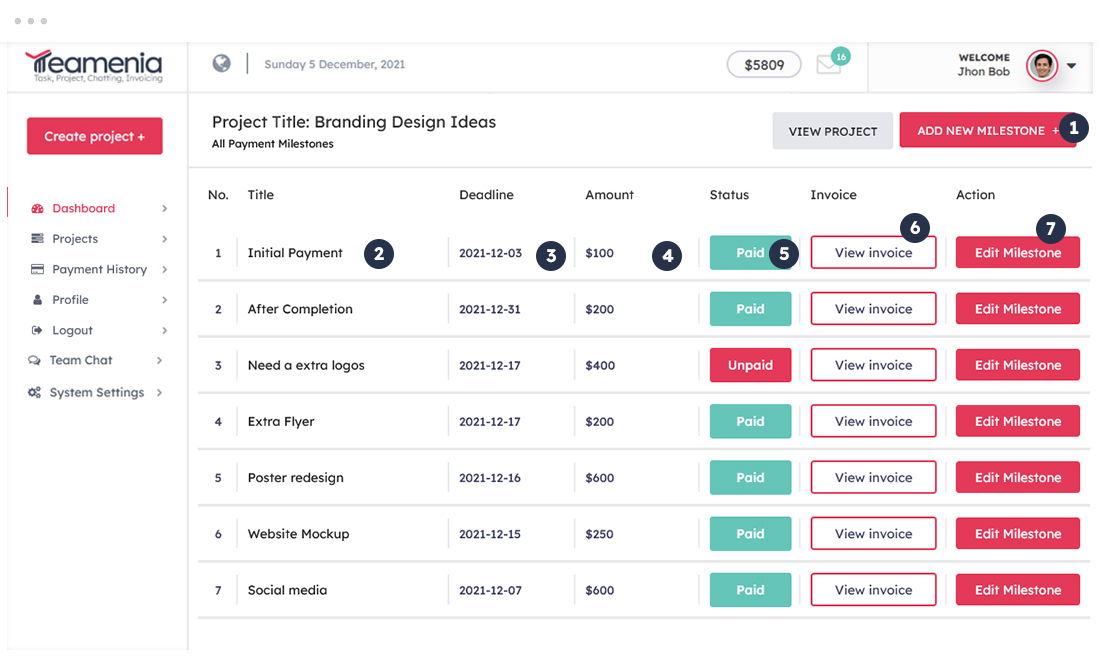
- ADD NEW MILESTONE button will leads you to create a new milestone
- Each milestone requires specific title
- Each milestone must have a deadline
- This shows status of paid or un-paid invoice.
- Click on invoice button to read all invoice information. You can download pdf invoice or can get printable invoice as well.
- You can edit the amount, due date or create new milestone by clicking edit milestone button. If client gets you paid outside teamenia system then you can manual edit the information to the system
Realtime Chat Messaging
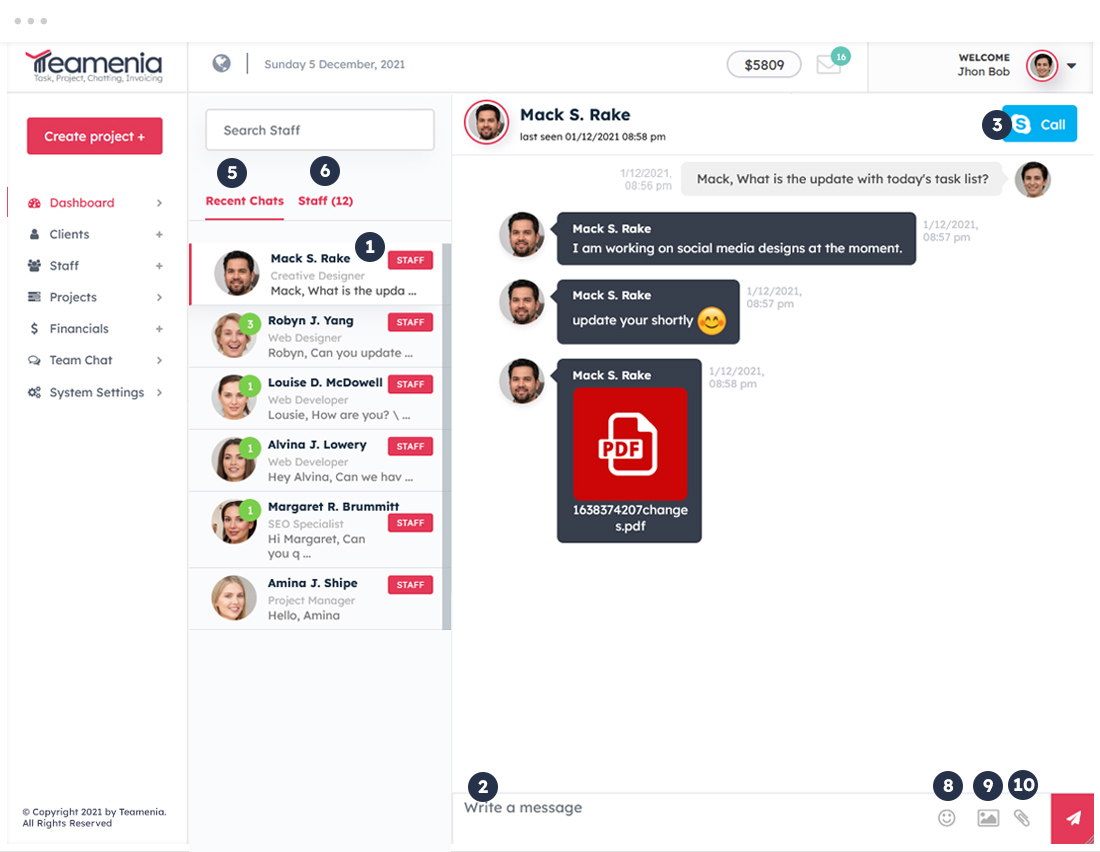
- Click on team member name to initiate your conversation
- This area is to write or compose your message to staff or any team member
- Skype button will lead you to connect through skype call
- Clicking on recent chats leads you to check your most recent messages
- You can check the recent chats in this area.
- Pick your most love EMOJI to share your team member
- Upload image by using this feature in your message
- You can share files by using this button
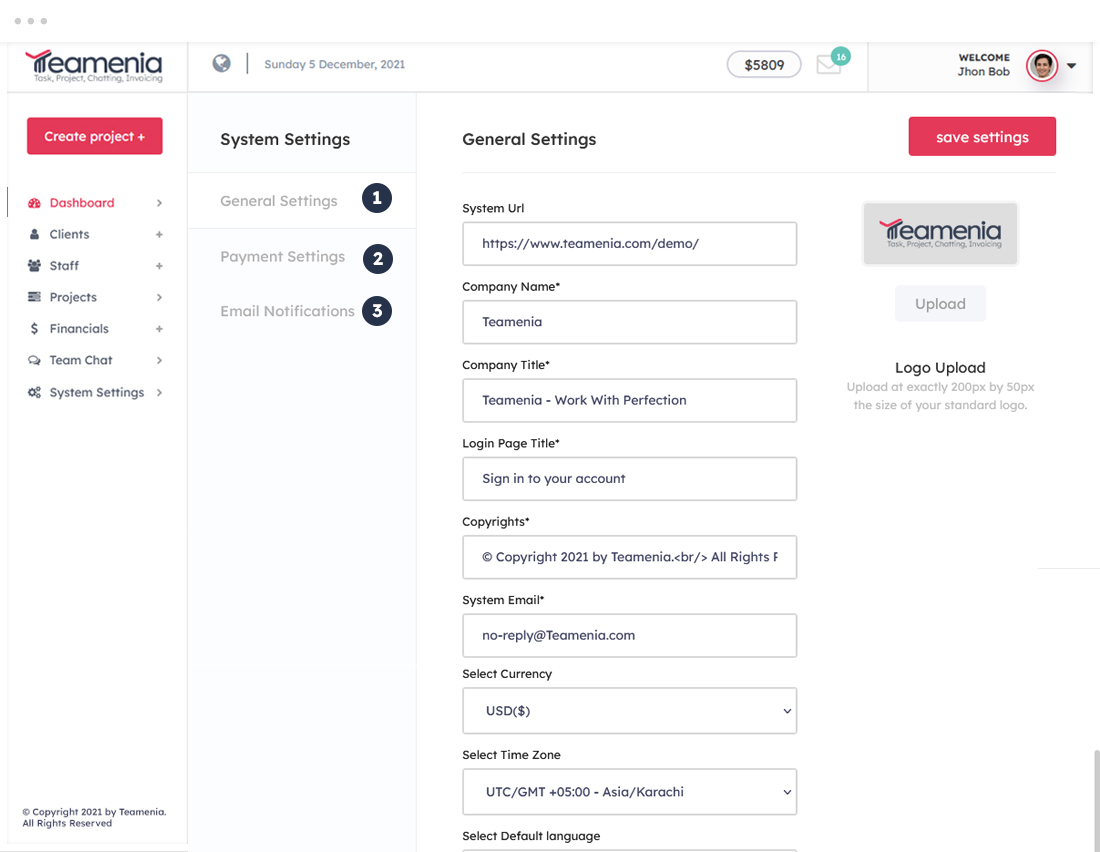
Settings
This system offer you wide range of choices as per your need. Here are the listed featured that you can explore or use.
List of System Settings Features
-
General Settings: In this section, you can change the application logo, fav icon, company name, company title, login page title, system email, currency, timezone. View settings for more options.
-
Email Settings: At the time of installation, You will required to use your company email address which will act as a main email. All the notifications will come to the email which you have added to the system. This email will be considered as your mail system email address. All the reciever will get this email in their inbox. It will be your sender email as well. If any new user added to the system, You will get immediate notification as well. Similarly whatever activity happens in your system. You will get notify too.
- Payment Methods: In this section, You can add or integrate your desired payment method.
Payment Settings
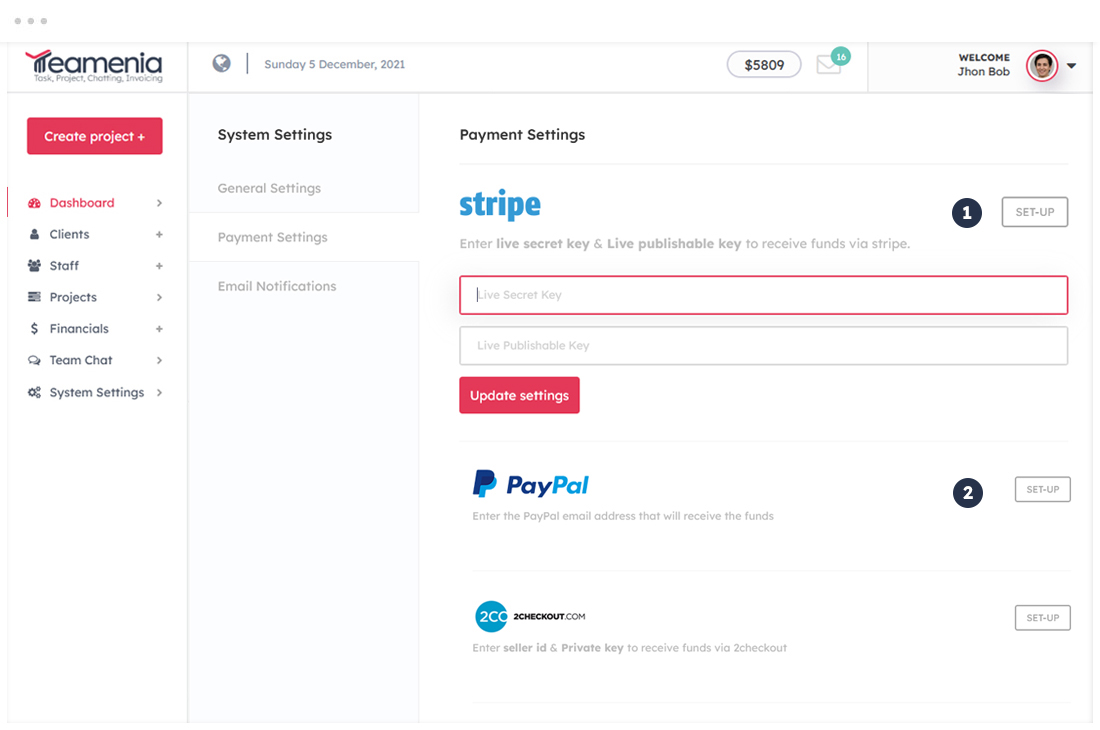
- Paypal: Enter your valid paypal email adrress to integrate paypal account.
-
Stripe: Enter live secret key & Live publishable key to receive funds via stripe.
-
2checkout: Enter seller id & Private key to receive funds via 2checkout.
Email Templates
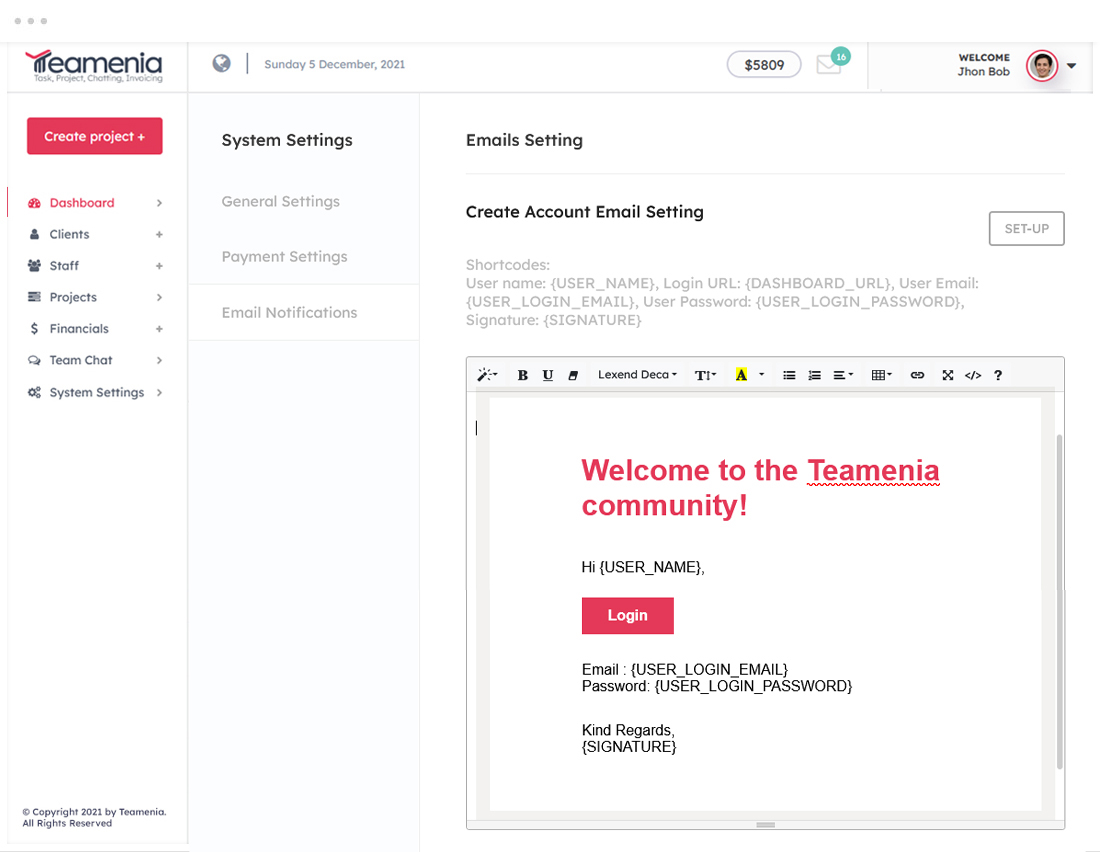
-
Email templates: This system is using default email template. If you wish to change the layout or edit anything, You can do it as well
Thankyou
Thanks for using Teamenia. We are working hard to keep upgrading it's feature
If you have any query send us email at
[email protected]
Best wishes
Teamenia